Savory! The Tale of the Vanishing Chicken Pot Pie.

I thought I would only be posting about the sweet treats I’d baked up, but I’ve been sneaking my way into the savory realms as of late and thought I’d share with you the dinner I made last night. Through pictures, of course, because it’s already gone. 

I just sort of went with it. I glanced at a few recipes and realized that it was basically a throw together dish, so this is what I threw together and it was FABULOUS: 

DOUGH

I like chicken pot pie to have crust on the top and the bottom, so this dough recipe makes enough for both:

  • 3 cups flour
  • 1 teaspoon salt
  • 1 cup shortening
  • 1 egg, beaten
  • ¼ cup plus 1 tablespoon ice water
  • 1 tablespoon vinegar

Combine the flour and salt. Cut in the shortening until it looks like coarse meal. You can use a pastry cutter/blender, but I took the short cut and threw it into my food processor. I gave it about 20 good pulses.

Image

Whisk the rest of the ingredients together and pour it over the flour/shortening mix. Stir with a fork until everything is moistened. Half the dough- one ball for the bottom and one for the top. Put ’em in baggies and stick ’em in the fridge.

Image


FILLING

  • 1 1/2 lbs cooked and shredded chicken
  • 5 cups of your favorite diced pot pie vegetables(carrots, celery, onion, potato, etc.)
  • 1/2 cup flour
  • 3/4 cup heavy cream
  • 3 cups of chicken broth
  • 1/3 cup butter
  • salt and pepper to taste

Cook your chicken and shred it. I bought chicken breast cutlets, seasoned them with salt, pepper, oregano and rosemary and cooked them in a skillet with butter and olive oil. When the chicken was done, I poured the oil and juices from the skillet into the pot I was about to cook my veggies in. TASTY!!

Image

This is where you throw in whatever you love in a pot pie. You’ll need roughly 5 cups of diced veggies. I used carrots, celery, potato, yellow onion, and two cloves of garlic as well as some frozen peas, but DON’T sautee frozen veggies with your fresh veggies! They go in later. 

Melt 1/3 cup butter in a large pot. Add your veggies and sautee until they’re almost tender, but not quite. You don’t want mushy veggies in your pot pie. Also, I start seasoning now. You can always add more at a later stage, but salt and pepper go a long way when being cooked with veggies in butter. 🙂

Image


Add 1/2 cup of flour and cook for about a minute, stirring constantly.

Gradually add your cream and chicken broth. When it’s thick and simmering, add your chicken and any frozen vegetables now. Let your filling simmer while you roll your dough!

Roll one ball out to about 1/8 inch thick and place it in a deep dish pie pan OR do what I did and use a 9×2 cake pan! Worked like a charm!

Add your glorious, tasty filling!

Image

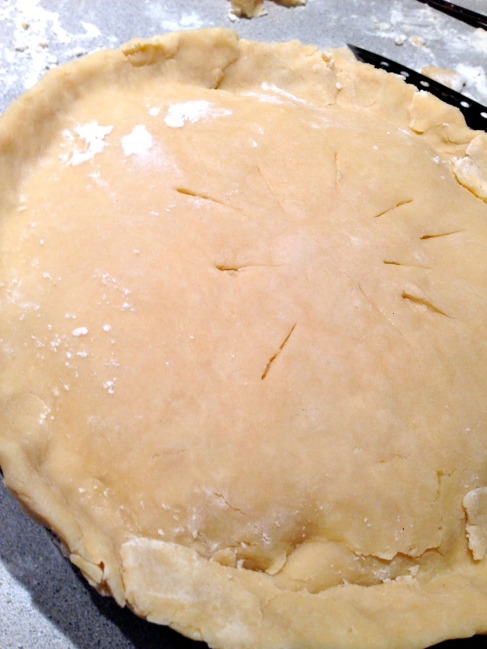
Roll out your second ball of dough and fit it on the top. Paint with egg wash. Cut a few slits in the top for ventilation.

Image


Pop in a preheated 400 degree oven until the top is golden brown!

Image

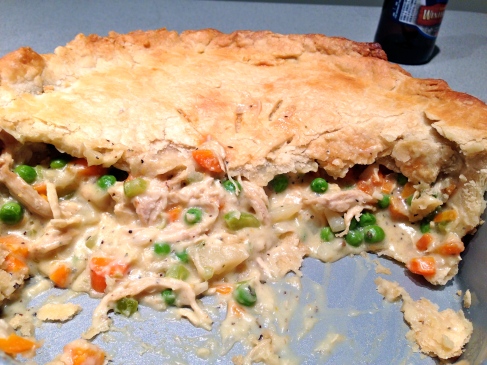
It’ll be gone before you know it.

Image

I hope you enjoyed my first savory recipe!

-Tex

Classic Birthday Cake, But Moist!!!

Everyone’s been handed a piece of yellow cake at a birthday party. It’s a gamble. That you normally don’t win. Yellow birthday cake is too frequently dry and underwhelming. It’s sad.

It’s also sad to admit that I committed dry yellow cake baking last month. I baked a four layer purple and turquoise cake with fudge frosting for a friend’s birthday and while it looked beautiful, it just did not taste and feel amazing. The cake recipe was from a fancy cake book that I had checked out from the library and I was SO excited about. It was a very meticulous and time consuming recipe and it produced beautiful looking cakes, but the end result was just OK.

My boyfriend’s birthday was on Saturday and he had picked a classic yellow cake with fudge frosting as his birthday cake of choice and I was determined not to serve him dry cake. I scoured the trusty interwebz and came across this gem of a recipe. I was surprised to find that the ingredients and directions were both very simple and straightforward. Not to mention, what?! There are two whole cups of water in this cake?!

The fudge frosting is super simple:

1 pound semisweet chocolate

2 cups heavy cream

1/2 cup brown sugar

Put chocolate in medium size heat resistant glass bowl, set aside. Heat cream and sugar in saucepan on medium heat, stirring occasionally, until it just starts to simmer– then take off heat quickly, pour over chocolate. Cover with plastic wrap for 5 minutes. Whisk slowly from center to outside until mixture is smooth. You can leave the bowl on the counter for about an hour to thicken up, or do what I do- stick the bowl in the fridge and stir it every 15 minutes or so until it thickens up enough to frost a cake. You want it to be about room temperature. Super simple. Super yummy.

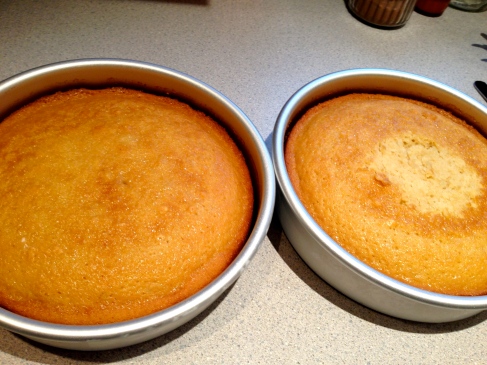
I whipped these puppies up really quick and ended up with two beautiful, moist but fluffy vanilla cake layers that I could be proud of:

Image

I had already shaved the top off of the cake on the right to taste 🙂

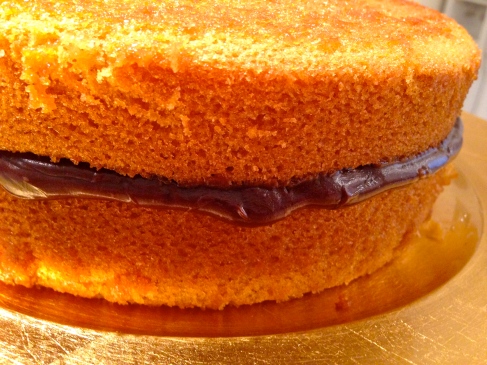
I leveled them down even further and stacked them with a generous layer of fudge frosting in the middle:

Image

I smoothed the frosting squishing out all over the cake for the crumb coat and popped it in the freezer for 10 minutes to set:

Image

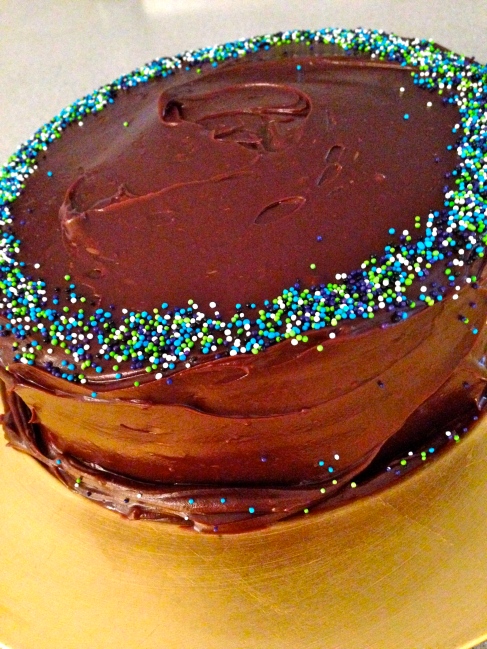
Finished frosting and added some galaxy sprinkles:

Image

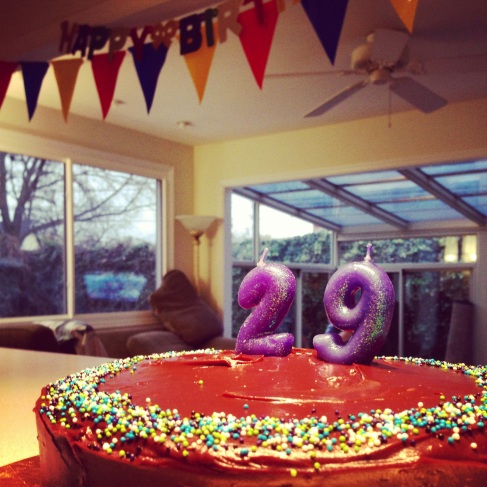
Then surprised my favorite birthday boy!!

Image

Go find someone who’s having a birthday and make this cake for them! It’s tasty.

Until cake pops..

-Tex

Cocoa Brownies. For real.

Let me start by saying that I’m sorry about the homemade cinnamon rolls. My boyfriend decided that he’d rather take a load off at the donut shop and quite frankly, I was happy to oblige. Needed a break. TODAY, though, there are cocoa brownies baking in the oven. And as I write this post, I am licking the remaining batter from the bowl. So good.

As a food blog recipe peruser, I rely heavily on pictures and reviews of recipes before baking. This recipe out of MANY that I considered jumped out at me. These looked like FUDGE. Dark. Chocolate. Fudge. AND the recipe was simple, used just butter for fat and just cocoa (a LOT) for a dark chocolate taste.

I followed this recipe to a T and everything was perfect. I wouldn’t say that these are everyday brownies, though. They have an extreme chocolate taste. They’re wonderful for those..monthly..cravings and the occasional ultra luxurious dessert.

I was a bit worried that the whole homemade double boiler thing for the cocoa, butter, and sugar might not work out, but it was perfect!

Ingredients coming together slowly..

Ingredients coming together slowly..

Everything continued to progress very smoothly..pun intended. 🙂

Ingredients fully incorporated! Yay homemade double boiler (with a heat resistant glass bowl, of course)!!

Ingredients fully incorporated! Yay homemade double boiler (with a heat resistant glass bowl, of course)!

This was after adding vanilla and egg to the cocoa mixture.

This was after adding vanilla and egg to the cocoa mixture.


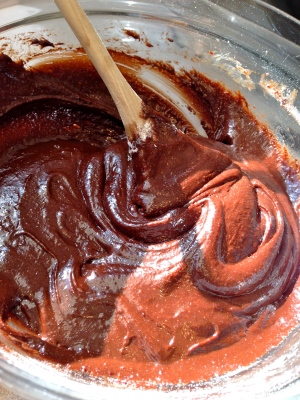
And THIS is the loverly finished batter!

And THIS is the loverly finished batter!


Everything about this recipe was simple AND it didn’t destroy my kitchen. Clean up was super easy. That always gets brownie points in my house (again..pun intended).

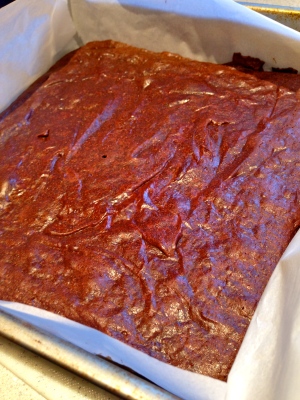
THE BEAUTIFUL FINISHED PRODUCT:

Precut.

Precut.

The parchment paper lining made everything a snap to clean up. No messy brownie pan with stubborn brownie residue.

Plated!

Plated!

Again, I warn you that these are very chocolatey and rich. I cut these small- about 2″x2″. Because that’ll truly be all you need…along with milk, of course.

Happy Baking

-Tex

Sweet Weekend Plans

I have spent the past two days drinking prosecco and reading Eat, Pray, Love. As a bartender, my weekdays normally consist of about half an hour of work opening the bar in the morning and for the rest of the day, I’m free. 

The last few days have been slow and comfortable but TODAY IS FRIDAY. And I work a double. I won’t be baking today, but I can tell you that on Sunday morning (my first day off of next week’s cycle and my mail man boyfriend’s ONLY day off), I will be making HOMEMADE CINNAMON ROLLS!!

Oh yes. I will be. 

So this is the “just you wait” post in which I didn’t actually make anything, but told you that I was gonna…

See you soon

-Tex

Pumpkin Walnut Streusel Muffins

Its fall. But it’s not going to be fall forever, so you’ve got to get your pumpkin fix while you can! I understand that cans of pumpkin puree are available year round, but it doesn’t feel as appropriate or magical to eat a slice of pumpkin bread or a piece of pumpkin pie in July. Am I right??

I have made pumpkin chocolate chip cakies this season that came out fantastic and addicting. They were gone pretty quick..

And for SOME reason, in my head, I think making a bundt cake for the three people that live in this house is overkill. BUT, I’ll make two dozen streusel muffins instead and somehow that’s better?! It’s totally not and the amount of batter for the muffins is either equal to or surpasses the amount of batter needed for a bundt cake. I’m craycray.

Anyway..

I decided that since I had already made a few cookie recipes lately, I’d take a stab at muffins. I had an image in my head of a deep, dark, spice orange muffin. Tall and moist, very pumpkiny and very fall appropriate. This recipe was more reminiscent of unremarkable banana nut muffins from a box mix growing up…

BUT- I tweaked the recipe before I popped the second batch in the oven, and it enhanced the experience drastically. They still aren’t my favorite and I definitely won’t be using this recipe again, but they were very edible and hungry men after work will eat a few without thinking twice.

Here is the base recipe.

I creamed the butter and the sugar..yadayadayada..

Image

And then I mixed my dry ingredients (including spices) in a different bowl and I realized a big problem right out of the gate: there was definitely not enough spice written into this recipe. You can just tell by the color of the mix. If it’s supposed to be a pumpkiny baked good, the dry ingredients should LOOK like there are alot of yummy fall spices all up in there. I DOUBLED the amount of pumpkin pie spice AND added a healthy amount of cinnamon and nutmeg on top of that.

Image

…the weird feeling about flour to spice ratio remained as I continued..

I added the flour to the wet mix gradually, and measured out my pumpkin-BECAUSE- a can of pumpkin is not a cup and a half. It’s a cup and 3/4. It can make a difference. So measure your pumpkin:

Image

I used walnuts instead of pecans in this recipe because that’s what I had on hand, and because my nanny always puts walnuts in her baked goods and I approve every single time.

I followed directions to a T, topped them with streusel, and they baked up fine. Just not awesome. And then, when I picked one up and actually tasted one, I knew these weren’t remarkable in any way. I wouldn’t be happy baking another dozen unremarkable muffins with the rest of the batter. SO, I made up a brown sugar filling:

Image

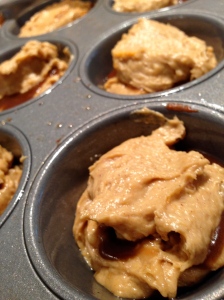
I plopped a small spoonful of batter into the bottoms of the muffin cups, and then pressed a spoonful of brown sugar filling (similar to the way that you press gravy into mashed potatoes- creating a cavity and filling it at the same time) into the batter, topping it with another spoonful of batter.

IMG_4262

I sort of had to smooth the last spoonful of batter around with my finger to cover all of the filling. Then I topped them all with ALOT MORE streusel and tried THAT on for size.

The results are in…

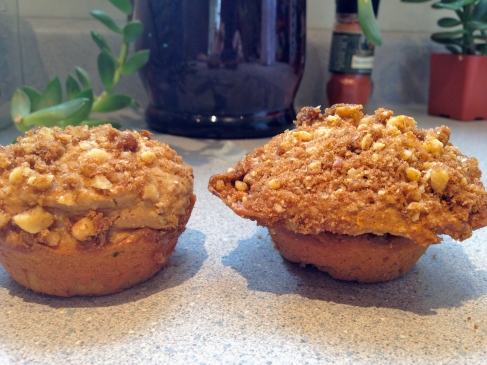
Image

On the left, we have Sad, Bland Little Pumpkin Walnut Streusel Muffin. On the right, we have PUMPKIN WALNUT STREUSEL MUFFIN 2.0!! Which was still, honestly, just OK.

The moral of this post is: a nice, respectable pumpkin bundt cake is NOT overkill for 3 people. More on that later.

-Tex

P.S.- If, for some reason, you decide to try this recipe and then realize that, “Oh yes, she was right. These ARE bland.”, one thing I learned growing up in Texas: Everything always tastes better when you warm it up and put some butter on it. 🙂

French Macarons!!

I’ve always heard that French macarons were super hard to get right. But lately, there has been a giant influx of pictures of French macarons on the interwebs(rainbow stacked macarons, mint green macarons heaped stylishly in front of a hip, earthy background), and I eventually succumbed to the temptation of attempting a batch.Image

I have to admit, I initially made these because they were cute. I mean, look at how pretty the batter looks! I had never had a French macaron before and being a Southern girl who would take a piece of Texas sheet cake over a dainty pastry any day, I wasn’t exactly looking forward to eating them..

BUT. I made a dark chocolate ganache filling. ‘Nough said. Unfortunately, I don’t have a picture of the ganache, because I hadn’t yet decided to share all of my baking adventures with the interwebs, but- mark my words- I will get better at taking lots o’ pics!

Image


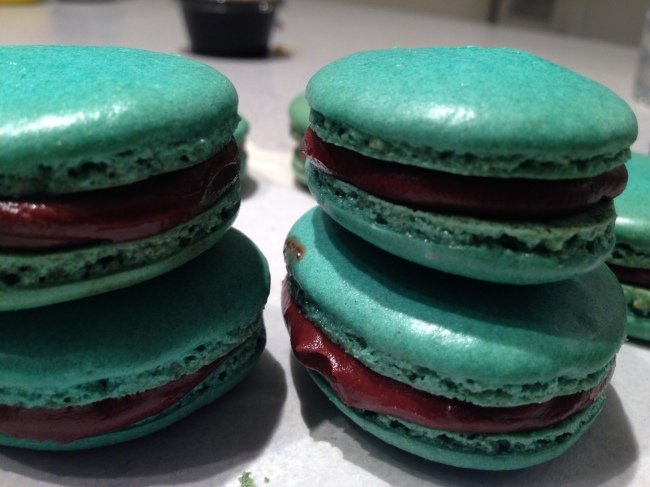
Macarons for dayyyss… As you can see- baking the mixture reduces the vibrancy of the color a bit. So keep that in mind.

For the macaron cookies, I initially started out with this recipe, which has an extremely helpful video to go along with the written recipe. If you haven’t made a successful batch of macarons before, I suggest you watch her quick video before diving in. There is a fine line between a perfectly mixed batch of macaron batter (batter? dough? what IS it?!) and OVERLY mixed. She also shows you all the different ways a macaron can fail and what the problem was during mixing and/or assembly.

A few things to consider:

  • My mixture did not take nearly as many folds as she said would be needed to reach ideal consistency, so check the vid to see what the consistency should look like before folding your arm off..
  • For whatever reason, the cooking temperature and times on her page DID NOT work for my macarons. I peeked in the oven and thought I had failed miserably. They looked like teal silver dollar pancakes. Bad new bears.. So I let them hang out for several more minutes and nothing improved… in a panic, I switched over to the recipe page I had waiting for my chocolate ganache (which also had a macaron recipe) and looked at the times she had listed. A WORLD of difference! I cranked the oven up to 350, and within a few minutes, the feet on my sad silver dollar pancakes were developing!  Tiny pancakes no more!

Image


The ganache!!

Chocolate ganache is pretty simple, but I wanted to make sure a had a recipe that was the right consistency for macaron filling. This one was a charm. I’m also praising this recipe because the cooking times and temperatures for the macarons saved my batch! 

A couple thoughts:

  • When piping the ganache onto the macarons, use a pretty wide pastry tip. If you use a thin one (like I did..), the friction from trying to squeeze a thick ganache out of a small hole will cause the ganache to heat up just enough to be a bit too runny for assembly, which brings me to my next point…
  • Everything goes a lot smoother (literally) when the ganache is considerably colder than room temperature. If your ganache warms up a bit too much in your hand or if you became engrossed in a particularly charming episode of Say Yes to the Dress and forgot that you were holding a pastry bag full of ganache for 15 minutes or whatever, its way worth it to stick it back in the fridge for a few minutes and return it to a cooler temperature.

This was my first batch and it was nowhere near perfect. But it was fun, they were very edible, and I don’t think it was a complete and utter failure. The moral of this baking story is: crosscheck several recipes and the reviews if they have them before you get started. It may save you time and ingredients!!

I have to go open the bar (even though it’s a Tuesday morning and I doubt anyone will be gettin’ their drank on..) but when I get home, I’ll be trying a new recipe! 

Stay tuned!

-Tex

Pumpkin Chocolate Chip “Cakies” Because Rain.

I am a bartender at a casual dining chain. Translation: I make next to no money and have lots of off days. Pair that with depressing, gaggy, wet weather and the result is a bad mood. Unless you use the chilly rain and lack of obligation to make fall treats! And that, of course, is what I did.

Enter Pumpkin Chocolate Chip Cookies. The only cookie-ish thing about them, really, is their appearance. Everything else is cake. In a good way. So I dubbed them more appropriately: Cakies. Also, ‘cakies’ sounds cuter than ‘cookies’. So there.

Image

For these wonderFALL cakies, I used this recipe, and a couple of my own touches:

  • add 1 1/2 tsp nutmeg along with cinnamon
  • after stirring in baking soda, fold in 1/4 cup of heavy whipping cream, whipped to soft peaks
  • i used equal parts semi sweet mini chocolate chips and regular milk chocolate chips. I do this in every chocolate chip recipe now, thanks to a DIVINE chocolate chip cookie recipe shared with me by my friend, Karissa.

Image

These guys are really moist, so for storage, beware of stacking one on top of the other (..as I did in the above photo…) to avoid cakie rips and bottom residues on tops..

Happy Baking!

-Tex